Visualizzazione post con etichetta Preparazioni Base. Mostra tutti i post

sabato 25 marzo 2017

Pane in cassetta integrale - Whole-wheat sandwich bread

Tramezzini... a me!!
Sandwich... come to me!!
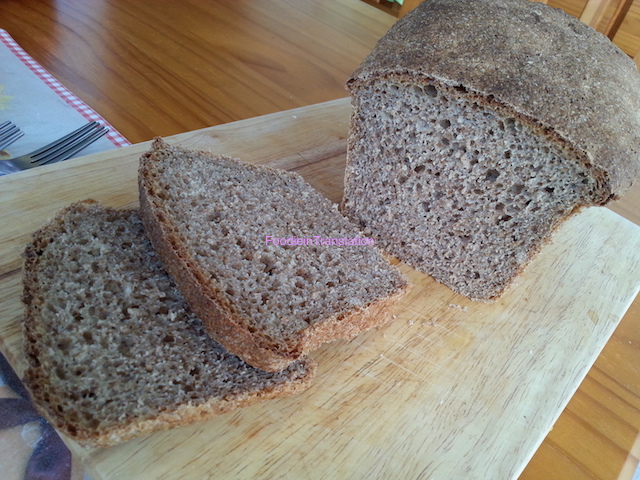
Pane in cassetta integrale - Whole-wheat sandwich bread

In alternativa ai panini comperati al bar o per preparare dei tramezzini a mo' di antipasto per l'happy hour nel weekend, il pane in cassetta è sempre il benvenuto in casa nostra.
Adatto a qualsiasi tipo di preparazione, questo pancarrè ha di particolare solo una cosa: la farina.
Ho usato quella integrale e non avrei mai detto che potesse venire così bene, forse addirittura meglio del pane in cassetta preparato con la semola (potete trovare la ricetta qui: pancarrè con farina di semola) o con la farina normale (potete trovare la ricetta qui: pane in cassetta homemade)! 😉


Pane in cassetta integrale

Ingredienti

600g di farina integrale
400g acqua
12g lievito fresco
10g zucchero integrale di canna
10g sale
12g olio evo


Whether for a lunch in a rush or some happy hour starter during the weekend, sandwich bread is always welcome in our house.
Perfectly fitting for every kind of preparation, this recipe just needs attention on one thing: the flour.
This time, I used whole-wheat flour. Hey, what a difference!
I would have never said that the result would be better than the homemade sandwich bread made with durum wheat flour (you can find the recipe here: semolina sandwich bread) or than the one with all-purpose flour (you can find the recipe here: homemade sandwich bread)! 😉


Whole-wheat sandwich bread

Ingredients

600g whole-wheat flour
400g water
12g fresh yeast
10g brown sugar
10g salt
12g extra-virgin olive oil


In una grande ciotola mescoliamo la farina, il lievito, l'acqua, lo zucchero, l'olio e il sale.
Mix flour, yeast, water, sugar, olive oil and salt in a big bowl.


Quando l'impasto sarà ben amalgamato e liscio,
Once the dough is well combined and smooth,


mettiamolo a riposare per almeno un paio d'ore finché non avrà raddoppiato il volume.
let it rise for a couple of hour or until it is doubled in size.


Togliamo l'impasto dalla ciotola, diamogli una forma allungata e trasferiamolo in uno stampo da plumcake foderato di carta forno
Remove the dough from the bowl, give it an oval shape and put it into a loaf pan lined with parchment paper


e lasciamolo lievitare per un altro paio d'oro finché l'impasto non avrà oltrepassato i bordi dello stampo.
and let it rise for a couple of hours or until the dough dome over the edges of the mould.


Preriscaldiamo il forno a 200°C, inforniamo e cuociamo per circa 30-40 minuti.
Facciamo la prova dello stecchino e se il pane è cotto, sforniamo, lasciamo raffreddare ed è pronto!
Preheat the oven at 200°C, put the dough into the oven and bake for about 30-40 minutes.
Check for doneness using a toothpick and, if the bread is done, remove it from the oven, let it cool and sandwich bread is ready!!


Bon Appétit!!
Share This:        
Read More

venerdì 17 marzo 2017

La Rubrica del Venerdì: Zaatar - Friday's Page: Zaatar

Le mille e una... spezia!!
One thousand and one... spices!!

La Rubrica del Venerdì: Zaatar - Friday's Page: Zaatar
La Rubrica del Venerdì: Zaatar - Friday's Page: Zaatar 

Mi capita spesso di leggere ricette internazionali e ovviamente mi imbatto in spezie a me sconosciute.
L'ultima volta ho scoperto il sumac, una spezia ricavata dalle bacche di un arbusto della famiglia delle Anacardiaceae, la Rhus Coriara, che cresce al caldo, soprattutto in Medio Oriente e in Sicilia.
Sembra che fosse conosciuta dai Greci e dai Romani, e che fosse utilizzata nel Medioevo, anche se non se ne hanno notizie precise.
Di solito si trova in polvere e viene sparsa direttamente sul pesce o sulla carne, oppure viene sciolta in un pochino d'acqua e poi aggiunta alla preparazione.
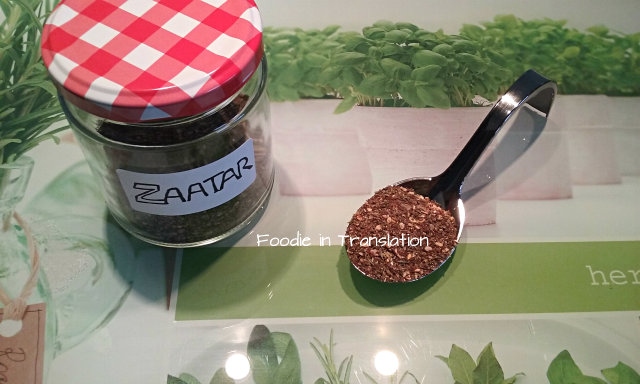
Un'altra cosa interessante è che il sumac serve per creare un mix di spezie tipico della cucina libanese, lo Zaatar, appunto.
In arabo, Zaatar significa timo, che è un altro degli ingredienti di questo mix.
Ma basta parlare, entriamo in azione!!


Zaatar

Ingredienti

2 cucchiai di sesamo dorato
4 cucchiai di timo secco
1 cucchiaio di origano
2 cucchiai di sumac
1 cucchiaino di sale

I often stumble upon some international recipes and I always find some spices I still didn't know.
Last time, I discovered the sumac, a spice made with the seeds of a shrub of the Anacardiaceae family, the Rhus Coriara, which grows in hot areas, mostly in Middle East and in Sicily.
We don't have precise information about it, but sumac was used in the Middle Ages and it seems that Greeks and Romans knew this spice already!
Usually you can find ground sumac to be sprinkled directly on fish and meat, or melted in a bit of water and then added at the preparation.
Another interesting fact, sumac is one of the main components of a typical Lebanese spices mix, the Zaatar, that is the subject of this article.
In Arabic, Zaatar means thyme, another ingredient of this mix.
Enough talking! Let's do it!!


Zaatar

Ingredients

2 tablespoons of sesame seeds
4 tablespoons of dried thyme
1 tablespoon of oregano
2 tablespoons of sumac
1 teaspoon of salt


Mettiamo tutti gli ingredienti nel mixer,
Put all the ingredients in a mixer,


mixiamo
mix everything


e il gioco è fatto!! 😁
and that's it!!😁

La Rubrica del Venerdì: Zaatar - Friday's Page: Zaatar

Enjoy your meal!!
Share This:        
Read More

mercoledì 1 marzo 2017

Pane al basilico - Basil bread

Pane veloce e profumato!
Fast and flavored bread!

Pane al basilico - Basil bread

Vi piace preparare il pane in casa, ma siete ormai stanchi dei soliti lievitati?
Questa ricetta fa al caso vostro!
È l'ideale quando vi accorgete all'ultimo minuto di averlo finito, perché velocissimo da preparare, ma ha anche un delicatissimo tocco in più: è aromatizzato al basilico 😊


Pane al basilico

Ingredienti

500g di farina integrale
390g di acqua
12g di lievito di birra fresco
10g di sale al basilico (la ricetta potete trovarla qui: sale al basilico)
15g di miele

Do you like to knead the bread by yourself, but you are looking for something new?
This recipe is for you!
It is perfect when you realise you need bread at the last minute, because it is super fast, but it has a distinctive trait also: it is basil flavoured 😊


Basil bread

Ingredients

500g whole-wheat flour
390g water
12g fresh yeast or 3g dry yeast
10g basil salt (you can find here the recipe: basil salt)
15g honey


In una ciotola grande mettiamo l'acqua, il miele e il lievito.
Non appena il lievito si sarà sciolto completamente aggiungiamo gli altri ingredienti, cioè la farina e il sale al basilico.
Put water, honey and yeast in a big bowl.
Once the yeast is completely melted, add the others ingredients, that is flour and basil salt.


Mescoliamo con un mestolo di legno finché il composto sarà ben amalgamato e lasciamolo riposare fino al raddoppio, circa un paio di ore.
Mix all the ingredient with a wood spoon until well combined and let it rise until doubled, about a couple of hour, for me.


Trascorso il tempo di lievitazione, preriscaldiamo il forno alla temperatura massima (per me 250°C), capovolgiamo la ciotola con l'impasto su una teglia ricoperta di carta forno e appena il forno ha raggiunto la temperatura, inforniamo.
Once the dough has risen, preheat the oven at the maximum temperature (form me 250°C), turn the bowl with the mixture in a baking pan lined with parchment paper and put into the oven as soon as it reaches the temperature.


Abbassiamo a 230°C, cuociamo per circa 30-35 minuti e sforniamo.
Set the temperature at 230°C for about 30-35 minutes and remove it from the oven.


Lasciamo raffreddare e portiamo in tavola!!
Let it cool and serve it!!


Bon Appétit!!
Share This:        
Read More

martedì 21 febbraio 2017

Sale al basilico - Basil salt

Più facile di così!!
As simple as that!!

Sale al basilico - Basil salt

Volete un sale diverso dal solito?
Possiamo aromatizzarlo con qualsiasi tipo di spezie o erbe aromatiche.
Di solito non aggiungo mai un solo ingrediente, ma vari.
E da dove è venuta oggi quest'idea del sale al basilico?
Dalla mia cucina quasi vuota: niente mixer, niente strumenti particolari e un bel mazzo di basilico fresco fresco... ah, benedetto trasloco... finirai prima o poi!!
Le foglioline più piccole del basilico sono perfette e con 5 minuti del nostro tempo il gioco è fatto!!


Sale al basilico

Ingredienti

sale integrale
foglieline fresche di basilico


Do you fancy a different kind of salt?
Well, you can flavor it with any spices or aromatic herbs you want.
In fact, I don't mix salt with a single ingredient, but a few of them.
So where does this idea of simple basil-flavored salt come from?
Once again, from my almost empty kitchen: no mixer, no specific tools and a wonderful fresh basil sprig... oh, my blissful relocation... I hope it will end sooner or later!!
The small basil leaves are perfect for this recipe and you will discover a terrific flavored salt within 5 minutes!!


Basil salt

Ingredients

whole salt
small basil leaves


Stacchiamo tutte le foglioline più piccole dai rametti di basilico.
Remove all the small leaves from the basil sprigs.


In un barattolo di vetro versiamo due dita di sale integrale e aggiungiamo il basilico.
Put two fingers of whole salt in a small glass jar and add the basil leaves.


Copriamo di nuovo con il sale, mescoliamo e il sale aromatizzato al basilico è pronto per essere usato! :D
Cover with salt, mix and the basil salt is ready for whatever you want! :D


Bon Appétit!!
Share This:        
Read More

lunedì 31 ottobre 2016

La Rubrica del Lunedì: Impasto per pizza con esubero di pasta madre - Monday's Page: Pizza dough with unfed sourdough

Paurosamente... buono!!
Frighteningly... delicious!!

La Rubrica del Lunedì: impasto per pizza con esubero di pasta madre - Monday's Page: pizza dough with unfed sourdough

Oggi niente zucche sghignazzanti o scheletri minacciosi... ma vi prometto che questa pizza è buona... da paura!!! ^_^
Ecco un nuovo impasto preparato usando la pasta madre invece del lievito di birra... anzi no, ho usato l'esubero di pasta madre!! :D
Ed essendo la prima volta che mi cimentavo nel preparare una pizza con l'esubero di pasta madre, ho preso spunto da questa ricetta collaudata ;)
Ora che ho ripreso, non smetto più!!
Speriamo solo che la pasta madre riesca a sopportare il prossimo trasloco... che è alle porte!! :D


Impasto per pizza con esubero di pasta madre

Ingredienti per 1 teglia 36x47

300g di esubero di pasta madre
240g di farina
150g di acqua
10g di zucchero integrale di canna
10g di sale
15g di olio evo

No sneering pumpkins nor threatening skeletons today... but I promise you that this pizza is literally... terrific!! ^_^
Here a new dough prepared using the sourdough instead of the normal yeast... well not, I used the unfed sourdough!! :D
For this first pizza attempt with unfed sourdough, I took cue from this tested recipe ;)
Now that I started again to use sourdough, I can't stop using it!!
I only hope it will survive the next move... which is just around the corner!! :D


Pizza dough with unfed sourdough

Ingredients for a baking pan 36x47

300g of unfed sourdough
240g all-purpose flour
150g acqua
10g unrefined cane sugar
10g salt
15g extra-virgin olive oil


Mettiamo l'esubero in una ciotola capiente,
Put the unfed sourdough in a big bowl,


aggiungiamo l'acqua
add the water


e facciamo sciogliere il lievito.
and melt the sourdough.


Aggiungiamo la farina e lo zucchero,
Add the flour and the sugar,


mescoliamo, poi aggiungiamo il sale e l'olio.
stir, then add the salt and the oil.


Lavoriamo l'impasto finché non diventa omogeneo.
Knead the dough until it is well combined.


Lasciamolo riposare per circa 3 ore.
Trasferiamo l'impasto in una teglia, rivestita di carta forno e ben oliata, e stendiamolo.
Let it rest for about 3 hours.
Transfer the dough in a baking pan, lined with parchment paper, and roll it out.

La Rubrica del Lunedì: impasto per pizza con esubero di pasta madre - Monday's Page: pizza dough with unfed sourdough

Lasciamolo riposare per altre 3 ore, poi farciamo nella maniera che più ci piace.
Questa volta ho optato per una semplice margherita.
Let it rest again for 3 hours, then finish the pizza with your favorite topping.
This time I chose a simple margherita pizza.


Bon Appétit!!
Share This:        
Read More

martedì 25 ottobre 2016

Pasta Madre: Simil nachos con esubero - Sourdough: Quasi-nachos with unfed sourdough

Alla faccia dell'esubero!!
Despite the unfed sourdough!!

Pasta Madre: Simil nachos con esubero - Sourdough: Quasi-nachos with unfed sourdough

La pasta madre is back... perché a volte tornano!! :D
Circa 4 anni fa avevo preparato da sola la mia bella pasta madre, l'avevo usata per parecchio tempo con soddisfazione, poi, dopo un trasloco, divenne così acida che, nonostante tutti gli sforzi fatti per recuperarla, non c'è stato nulla da fare e l'abbiamo persa... :(
Qualche settimana fa invece un'amica mi ha fatto un bel regalo: mi ha spacciato un bel pezzetto di pasta madre!!
Da lì, anche se con molta titubanza, lo devo ammettere, ho ricominciato con i rinfreschi e gli esuberi! :D
Ed ecco che ho voluto provare l'esubero per fare questi simil nachos!
Che ve ne pare?
Io posso dirvi che erano buonissimi e che sono andati a ruba tra grandi e piccini!!
Sourdough starter is back!!
Almost 4 years ago I started by myself my beloved sourdough, I used it for quite a long time, then, after a move, it became so acid I could not use it and despite all my efforts we lost it... :(
But some weeks ago one of my friends give me a present: she gave me a piece of her sourdough!!
From that moment, even if I was a bit hesitant, I start again with feeding and the unfed sourdough! :D
And I wanted to use the unfed sourdough to prepare this quasi-nachos!
What do you think about?
I can tell you they were delicious and went like hot cakes among grown-ups and kids!!


Simil nachos con esubero

Ingredienti:
200g di esubero di pasta madre
200g di farina
100g di acqua
basilico
olio evo
sale


Quasi-nachos with unfed sourdough

Ingredients:
200g unfed sourdough
200g flour
100g water
basil
extra-virgin olive oil
salt


Sciogliamo l'esubero di pasta madre nell'acqua,
Melt the unfed sourdough with water,


aggiungiamo la farina e mescoliamo
add the flour and mix


fino ad ottenere un panetto omogeneo.
until you get a solid ball.


Lasciamo riposare per 4 ore, dopodiché prendiamo l'impasto, dividiamolo in tre parti
Let it rest for 4 hours, then take the dough, divide it into three pieces


e stendiamolo sopra un tagliere, spolverato di farina.
and roll it out on a floury cutting board.


Tagliamo in piccoli pezzi triangolari o romboidali come fossero dei simil nachos.
Cut it into small triangular or rhomboidal pieces like quasi-nachos.


In una ciotolina mescoliamo olio, sale e basilico.
Mix olive oil, salt and basil in a small bowl.


Spalmiamo il composto sopra i ritagli di pasta
Spread this mixture on the little triangles of dough


e cuociamoli in una padella antiaderente, dove avremo messo un filo di olio, finché non assumeranno un colore dorato.
and cook them in an anti-adherent pan with a drizzle of olive oil, until they are golden brown.


Togliamoli dal fuoco, condiamoli con un pizzico di sale e, se volete mangiarli caldi, sono pronti da portare in tavola. :D
Remove from the heat, season with a pinch of salt and, if you want to eat them hot, just serve them. :D


Bon Appétit!!
Share This:        
Read More

martedì 11 ottobre 2016

Come... cucinare il cous cous - How to... cook couscous

Non si finisce mai di imparare!
You never stop learning!

Come... cucinare il cous cous - How to... cook couscous

Finalmente dopo due settimane riesco di nuovo a trovare un po' di tempo per scrivere un post.
E ricomincio con un tutorial estremamente semplice.
Ora vi chiederete: "Ma se è così semplice, perché farlo?"
Perché non riesco a togliermi dalla mente un programma televisivo di cucina visto qualche tempo fa in cui uno dei protagonisti palesemente non aveva idea di come cuocere il cous cous, quello precotto per giunta.
Ci sono rimasta così male, che ho capito che in cucina non bisogna mai dare nulla per scontato.
Un procedimento che per me è ovvio, potrebbe non esserlo per altri e viceversa, perché in cucina, come nella vita, non si finisce mai di imparare!! ;)
Ecco perché oggi voglio farvi vedere come preparare il cous cous ;)
After two weeks I finally got the time to post an article.
Let's start again with a very simple tutorial.
You may ask "If it is so simple, why bother?"
Because I cannot put out of my mind a food tv series I watched sometime ago where one of the competitors had absolutely no idea how to cook couscous, a pre cooked one.
I was so upset and I understood that you could not take for granted anything in the kitchen.
A procedure that is obvious for me could be unknown for someone else and viceversa, because in the kitchen, just like life, you never stop learning!! ;)
This is the reason why I am going to show you how to cook couscous today ;)


Come... cucinare il cous cous

Ingredienti:
100g di cous cous precotto
150g di acqua
olio
sale


How to... cook couscous

Ingredients:
100g couscous pre cooked
150g water
extra-virgin olive oil
salt


Mettiamo il cous cous in una ciotola,
Put couscous in a bowl,


portiamo a bollore l'acqua, copriamo il cous cous con l'acqua bollente e aspettiamo finché tutta l'acqua non verrà assorbita.
Se vedete che il cous cous risulta troppo secco, aggiungete altra acqua bollente, poca alla volta finché i grani non saranno belli gonfi.
bring the water to a boil, cover couscous with hot water and wait until the water is completely absorbed.
If the couscous looks too dry, add some hot water, little by little, until the couscous granules are soft and swallowed.


La "cottura" non richiederà più di 5 minuti, dopodiché condiamo con olio e sale
The couscous cooks in no more than 5 minutes.
After that, season it with olive oil and salt


e mescoliamo con una forchetta in modo da sgranare per bene tutti i chicchi.
Il cous cous è pronto, possiamo portarlo in tavola così e usarlo come accompagnamento ad altre pietanze oppure aggiungerlo ad insalate fredde o calde.
and fluff it with a fork.
Couscous is now ready to serve, you can use it as it is as a side dish or add it to some cold or hot salad.


Bon Appétit!!
Share This:        
Read More

martedì 13 settembre 2016

Come... pulire i fasolari - How to... clean smooth clams

Molluschi, I love you!
Shellfish, I love you!

Come... pulire le fasolari - How to... clean smooth clam

Oggi siamo alle prese con un nuovo tipo di mollusco: i fasolari.
Come sempre la prima cosa da fare è pulirli alla perfezione, altrimenti il gusto ne risente tantissimo.
I fasolari non vanno fatti spurgare come le vongole, ma vanno aperti con l'aiuto di un coltellino per poter eliminare la pellicina grigiastra che circonda la polpa e l'intestino, dove sono racchiusi dei sassolini che renderebbero i fasolari immangiabili.
Mi raccomando, quando apriamo la conchiglia, facciamolo sopra una ciotola, in modo da recuperare l'acqua presente dentro il mollusco.
Nella foto qui sotto si può vedere la pellicina da togliere; è stata evidenziata sia a sinistra
Today I am dealing with a new kind of shellfish: the smooth clams.
Like for the other shellfish kinds, the first thing to do is to clean them to perfection, otherwise the eating experience will be awful.
We don't have to purge sand from smooth clams, but we need to open them using a little knife to remove a grey membrane, who surround the flesh of the shellfish, as well as the intestine, which contains grits that would make the clam inedible.
Don't forget, when you are opening the clams, to do it over a bowl, so that you won't lose the water inside.
In the picture below you may find the grey membrane to remove; it is highlighted on the left side


che a destra della polpa.
and on the right side of the flesh.


Sembrano proprio due ali :D
A questo punto non ci resta che eliminare l'intestino, la sacca verdognola che sta sotto il piede rosso, come si può vedere nella foto seguente.
It looks like two wings :D
At this point you still have to remove the intestine, the green bladder right beside the red foot shown below.


Passiamo sotto l'acqua corrente i nostri fasolari e il gioco è fatto!
Sono pronti per essere cucinati!
Wash the smooth clams under cold running water and it's done!
They are ready to be cooked!


Bon Appétit!!
Share This:        
Read More